
At the end of 2016, my son and his family got their own place and I gave them one of my guest room beds. Rather than replace it, I turned that room into my train room. I bought a 4×8 sheet of decking grade half-inch plywood and some planks of pine to frame it. I also bought a pair of saw horses, figuring I would build the table under it later. I also bought a 4X8 sheet of foam insulation board and 6 pieces of 2x2x1 foam board. This after I read that foam board is much more practical and easier to build terrain than wood cutouts. I can attest that this is true. Another benefit is the entire diorama is lighter as well.
Also during my research I came across the Woodland Scenics products. They make pretty much everything a modeler needs to build a diorama for school or to build a model railroad. I bought the Subterrain 2% incline ramps to put my track into the multilevel position I envisioned. When I got the two sets of ramps back, I opened one of the boxes and it was mispackaged, not giving me the entire set of risers, but instead I had two sets of the same risers which would not elevate the way I needed. Since this was my first exposure to Woodland Scenics, I thought maybe I didn’t understand how it was supposed to work. But the guys at Papa Ben’s squared me away and exchanged the faulty package. With two correct sets, I was able to start planning the actual layout on the board.

The great thing about the Subterrain system is that you can use pins to affix the sections in place and test them to make certain the layout works before you need to glue them permanently. It was during this phase that I learned my initial design was…problematic. It required turn radii that exceeding the tolerances of most locomotives. I got the idea to use my Atlas preformed track curve sections as a pattern for the curves, figuring that if the Atlas track was designed and manufactured expressly for trains, that it would be a good pattern. Turns out that notion was only 80% correct, but I wouldn’t find out about that until later. Woodland Scenics might consider molding turn radius marks into the risers so modelers can have a heads-up about the turns.

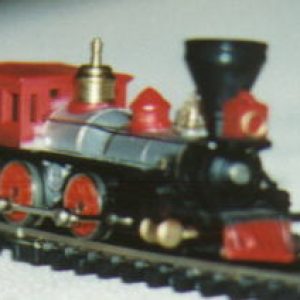
I did find out through research that there are several manufactured radii for N-scale track: 9.75-inch and 11.25-inch being common. Unfortunately, the difference can be significant when it comes to running the trains based on how long the locomotives and rolling stock trucks are. I worked to layout the risers to match the pattern I drew, and found it was a struggle to account for the crossing clearances. When I was at the train show in Stafford, I bought a model of a viaduct that I wanted in my setup, so I had to account for that length and then figure out the tunnel. In my first drawing I only had one tunnel planned.
I cut sections out of the riser where I needed the tunnel entrance to be and inserted gaps in the risers for the bridges.
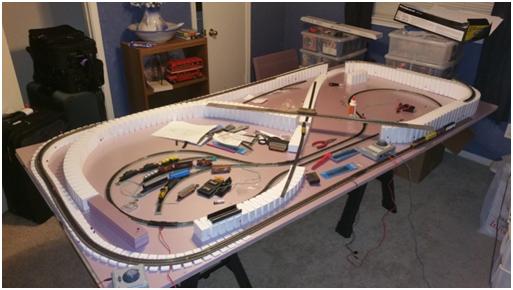
Using foam is so much easier than cutting plywood and having to measure angles. While I am not about advertising, if you want to learn more about the mechanics of using foam to build a layout, check out woodland scenic’s website and you tube channel. Of course, they will try to sell you their whole line of products and if you want to spend the money on them, go ahead. Just know there are cheaper ways of accomplishing the same goal. For example, the construction grade Styrofoam I bought for the buildup is a bit cheaper by the sheet and it doesn’t crumble as bad when cutting. I do recommend the incline blocks. As you can see in my model, I used cut sections of the pink foam to act as risers and buildups.
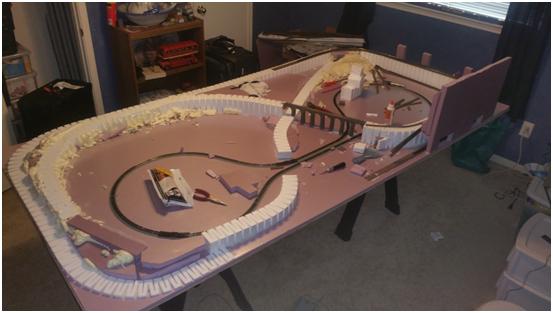
As you can see in this picture, I tried to use spray foam to fill in the gaps. DO NOT DO THIS!! It failed miserably and necessitated a major surgery on the layout to correct the problem. The foam got under the inclines and lifted them in spots, making the angle too steep for long trains. I have to cut the section out and re-glue them to get back to the 2% incline (which, by the way, is about as steep as you want an N-scale train to go).
One final thought on layouts. If you are adding a tunnel, leave cut out sections on the back to access the track in the event of a derailment.
 So I drew it out. Here is the plan:
